
How to Make Paper
Recently the Studio hosted our annual full-day summer class for children, Animals, Art & Imagination. It’s one of my favorite weeks of the summer because of the range of art activities we get to do with the kids in the Museum and outdoors. One of the morning activities we added to the week-long program this year was making paper! We blended cotton rag and natural fiber pulps with fresh leaves, petals and seeds. I purchased the cotton rag pulps, natural fiber pulps, reusable couch sheets, and a classroom set of Arnold Grummer’s Hand Molds. The classroom kit includes a set of 6 mold sets, which was plenty for us. I also really love the size of the molds in this set, they’re the perfect size for even our youngest students to hold by themselves.
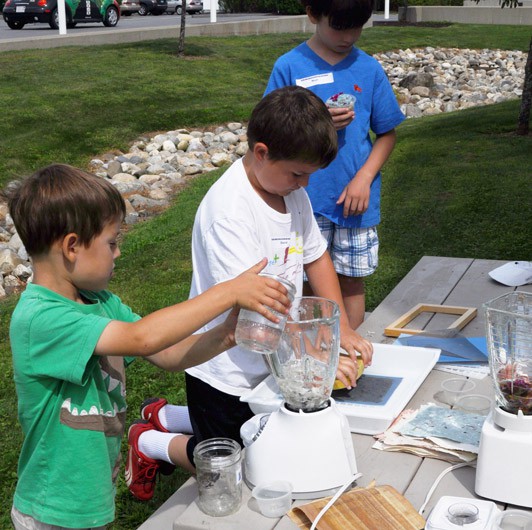
The other supplies for this project: kitchen blender, sponges, containers for water (yogurt cups, deli containers and jars worked well) and trays we had on hand to help the water from going on the floor. You could bring this project outside by connecting the blenders to a heavy duty extension cord.
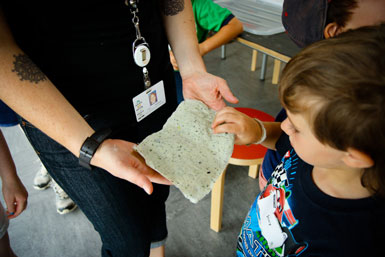
I talked with the students about the history of papermaking, where paper comes from, and passed around sheets of handmade paper and dry pulp for everyone to feel.
I went through each of the papermaking steps, turning the blended mash of pulp into a finished, pressed sheet of paper. We used the “pour” method of printmaking for this activity, where the pulp and water is mixed and then poured in one quick motion over the mesh mold.
The dip method is another way; you scoop the frame into a large tub of the watery pulp mix and pull it up, collecting the fibers on top of the screen and letting the water drain out the bottom. I chose the pour method because it’s easy to make as many sheets of paper as you need without any waste. I think it’s best for working in smaller groups or in indoor spaces where it’s not an option get the space very wet. I took papermaking in college, and the lab was designed with water drains built into the painted concrete floor and we had to wear rubber boots to keep our feet dry and prevent slipping on all the dripping water. Needless to say, papermaking is a very wet (but fun) media!
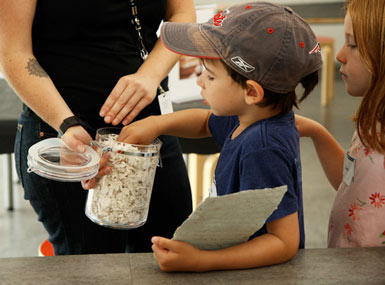
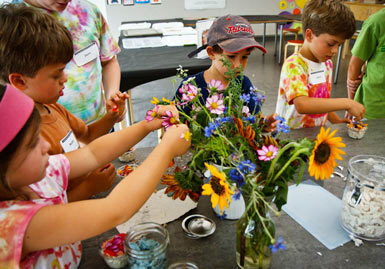
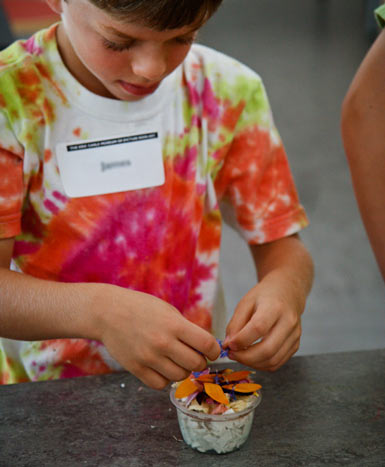
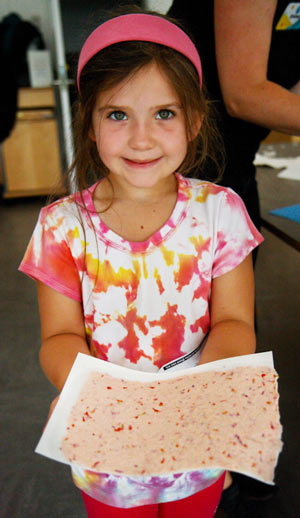
When it was the students’ turn to make paper, theyeagerly picked from the flowers, plants and seeds (collected from a nearby farm) and mixed them with the cotton rag and natural fiber pulps in apple sauce to-go cups (any yogurt or small plastic cup would also work). 1/2 a cup of dry pulp = One sheet of 5.5” x 8.5” paper.
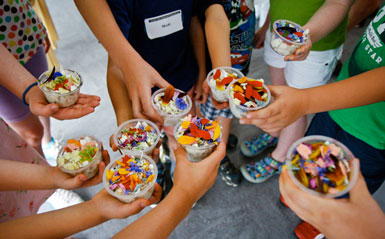
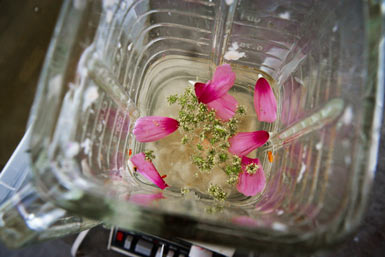
As you can see, no two sheets of paper were alike!
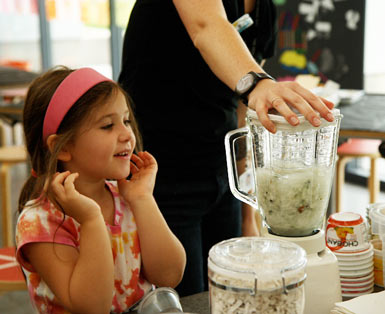
I put the blender at a big table so everyone could watch each other blend the pulp while they waited for their turn. You want plenty of water mixed with the pulp (we used about 3 cups) to help distribute the pulp evenly over the paper mold and keep it from clumping. Because the pulp was purchased pre-shredded, it only needed to be blended for about 10 seconds on low. Basically you want to mix it to the consistency of a thick smoothie.
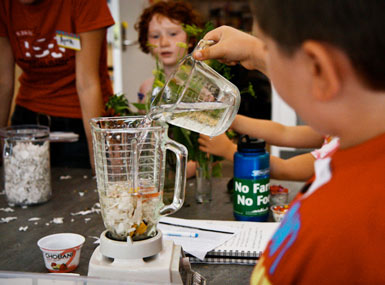
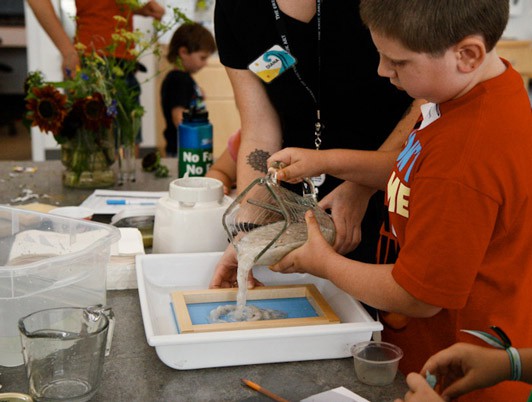
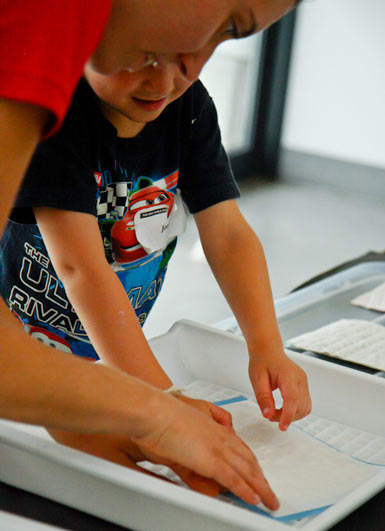
I assisted with pouring the pulp mix over the mold & deckle to make sure the pulp spread evenly across the mold. The oldest children poured the pulp themselves.
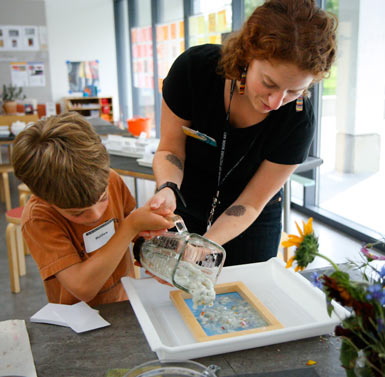
After removing the deckle, the wooden frame that helps give the sheet its form, we put a piece of screen on top of the pulp (it comes with the class kit) and used a large sponge to absorb as much water as possible, ringing out the sponge between presses. It’s hard to see in these photos, but the blue mold is sitting on top of a white plastic grid that came in the classroom kit, which helped give the mold its structure and made the water drain more quickly. 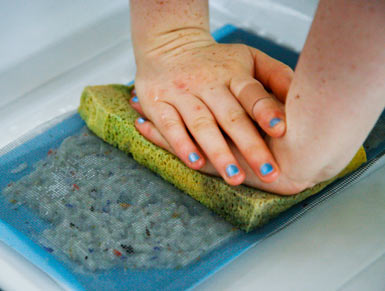
With most of the water drawn out by the sponge, the pulp sheet was transferred from the mold onto a couch sheet (very absorbent paper or material designed to draw any remaining water from the paper without sticking to the wet pulp). We helped them press out any additional water.
The next morning, the kids proudly showed showed off the paper we left drying on trays overnight. All of the paper sheets were completely dry and ready to bring home by that afternoon. So, total drying time indoors was 2 days, if you dry it in the sun they will dry even faster.
For this activity we worked with a group of twelve children, ages 6-10, and I had an assistant, helping me supervise the stations. It would have been very tricky to supervise everything myself. If I did papermaking with a larger group of children (classroom size), I would pre-blend the pulp in large buckets that we could scoop from and pour over the molds, instead of using the blender. The children could still make their paper unique and colorful by adding petals, leaves or seeds between poured the layers of pulp. I’m by no means a papermaking expert, but having some previous experience from college made me more confident with trying papermaking with a multi-ages class. I would recommend testing out all of the steps yourself a few times and watched some videos online to see the different variations.
Variations: If you don’t want to buy paper pulp, you could shred newspaper or printer papers instead. Someone told me shredded comics make fun, colorful paper! You could make your own set of hand molds with cheap picture frames from the craft store and a few supplies from the hardware store. Paper Slurry has a great tutorial to make your own deckle and mould. Our blenders are specifically for making paper, so you may want to find an old blender at a thrift store if you plan to make paper regularly, or just run your mixer through the dishwasher to thoroughly so you don’t get bits of paper in your next smoothie!
If you want to learn more about how to make paper, I encourage you to do some research, take a class, or watch some demonstrations of the pour and dip methods online. Below are a few quick videos that I found helpful: Here’s a 4th grade teacher demonstrating the dip method to his class. Here’s a version of the pour method by PaperStudio.com. Here’s how folks make paper in Nepal from the Lokta plant. Here’s a write-up on how to make paper with a classroom of children with window screens and duct tape. Have you ever made paper at home or in your classroom? Which techniques worked best for you?