
Mural Prints
This summer we were inspired by the exhibition The Picture Book Odysseys of Peter Sís, and we learned that Peter Sís works across many different media and formats. He illustrates books and creates public art for spaces such as the New York City Subway. His public art got us thinking about working on a large scale, and how we could explore a technique in the Art Studio that lends itself towards larger-scale projects.
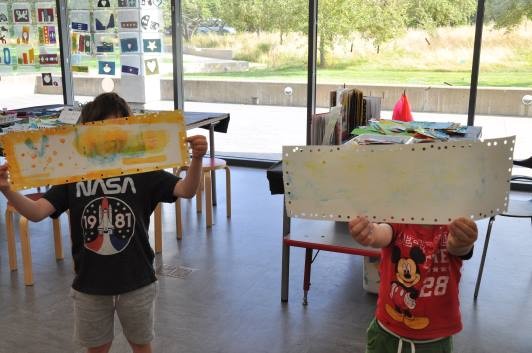
We decided to try out stencils and paint, and gave guests long pieces of watercolor paper to work with.
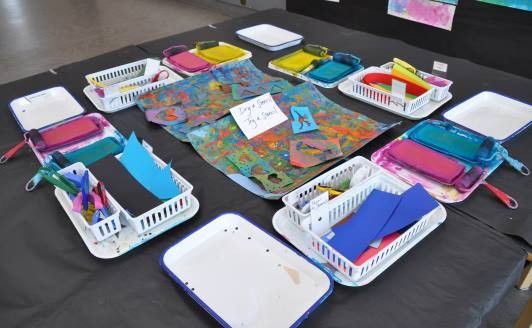
To set up our stenciling project, we thought about the different ways we could apply the paint to paper and decided to use a brayer. These rolling tools, often used in printmaking, are great for applying a thin, even layer of paint to a surface. These qualities make brayers a great tool for stenciling and exploring what happens when you layer different colors of paint on a surface.
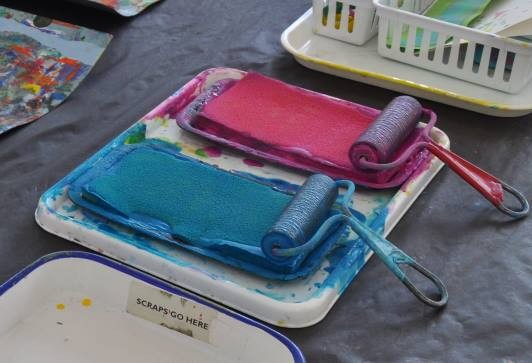
Because our Everyday Art Projects are presented in a drop-in format, we have to think carefully about how materials will be managed so that they are ready to be used, by guests of all ages, over a month. For this project, we decided to use washable tempera paint spread into our homemade stamp pads. These sponges keep the paint relatively contained for ease of clean-up, and water can be added throughout the day to keep them from drying out, allowing a little bit of paint to go a long way. We covered the brayer handles with colorful tape to help indicate which paint the brayer should be used with. We encouraged guests to mix turquoise, yellow, and magenta (used in the same way as primary colors) to create orange, green, and purple by layering the paint on their paper. When brayers did get switched onto a different color stamp pads (as they inevitably will in the course of experimenting and creating), it was no problem to rinse the brayers off and then wipe the surface of the stamp pad with a damp cloth, ready for the next person to use.
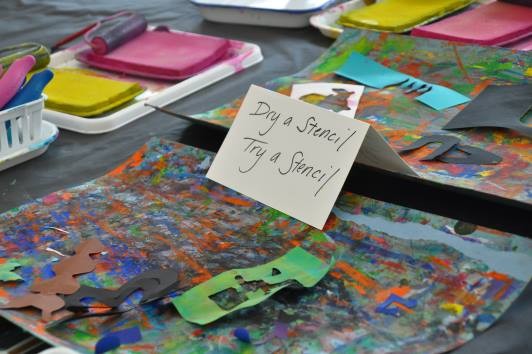
For the stencils, we used scrap papers that we had been saving from past projects. We try to keep as many scraps as we can, knowing that someday we will probably find a use for them. Sometimes the particular size, shape, texture, or color combination of scrap papers will even inspire a whole new project. We had accumulated lots of different sized pieces of construction paper and cardstock over the past year, so this project offered a wonderful opportunity to use these papers. We invited guests to turn paper into stencils by cutting and punching shapes into and out of the papers. We were so inspired by the stencils themselves that we added a “dry a stencil try a stencil” space in the middle of each table so that stencils, once made and tried, could then be reused by someone else. We also installed a series of clear sleeves on our window so that the stencils could be shared and showcased.
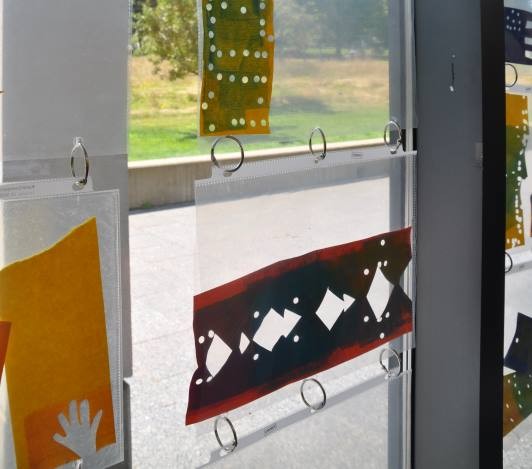
This window installation kept changing throughout the project as stencils were added and removed. As a result, the display became a dynamic and useful means of sharing ideas and materials, made by many people, over an extended period of time.
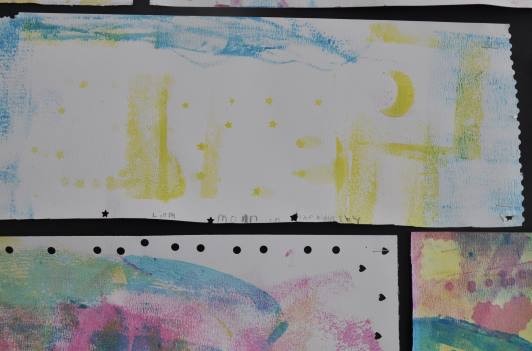
On the large watercolor paper, we could see the results of how guests were exploring the stencils and paint. Some guests chose to focus on how the shapes were arranged on the page to set a scene or tell a story. In the image below, the artist has written “moon in the night sky” across the bottom of their painting.
Some guests explored the patterns and colors that result from rolling one color on with a brayer and then rolling another color over top, often repeating stencil patterns and rotating them around the paper. The result from combining turquoise, magenta, and yellow paint over and over in different ways produces a range of hues, and repeating stencils creates a variety of patterns and textures.

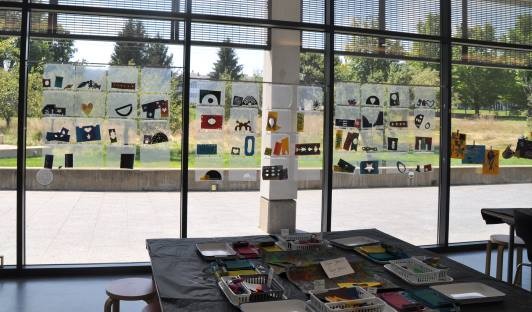
We used the large display space on the wall to create a collaborative mural that quickly filled up with the large papers, showcasing the many different ways the materials were used and explored.

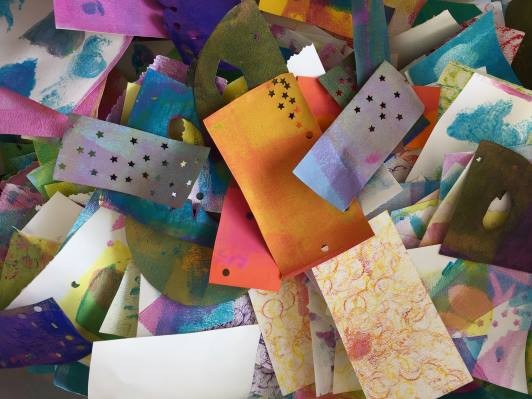
Each day, as we cleared the scrap trays and the “dry a stencil try a stencil” mats in the middle of the table, we noticed the beautiful effect that of layers of paint had on the stencils and scrap papers. Rather than recycle these papers, we trimmed them down and they were added to our collage paper collection, ready to be transformed again in a future Art Studio project. Sometimes, we will recognize a scrap of paper in a collage that has been selected and re-worked over two or three different project cycles by different people. It is this cycle of transforming materials and sharing ideas that we find so inspiring in the Art Studio.
